
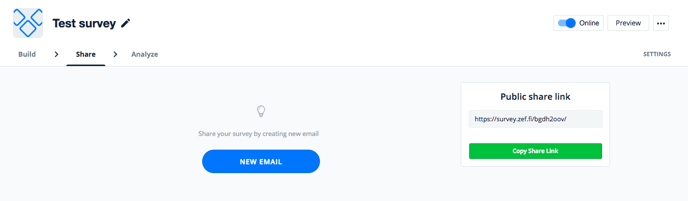
Instead of using a public link, you can deliver a survey to the evaluators via email. Start by creating, go to tab Share and click New email.
Instead of using a public link, you can deliver a survey to the evaluators via email. Start by creating, go to tab Share and click New email.
Hint! Add contacts on the tab Contacts before creating an email invitation.

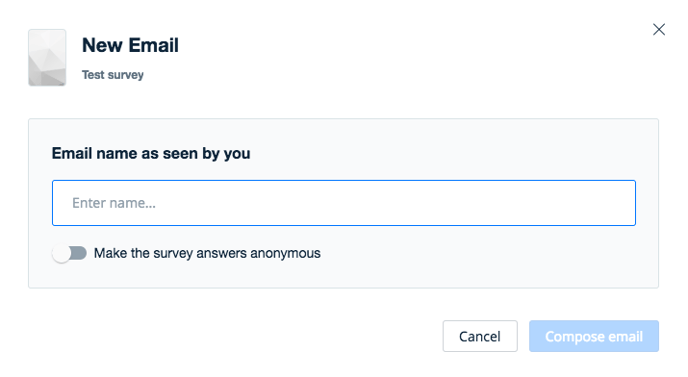
On the following view, you will give a name for the invitation that will be shown only for you. Also define, if you want the survey to be anonymous or not and then click Compose email.
If you want the survey to be anonymous, click Make the survey answers anonymous on. When the survey is anonymous, you can see, who of the evaluators have answered, but you cannot connect an evaluator and an answer. When the survey is anonymous, you can connect an evaluator and an answer.
On the next page select either English or Finnish to the language of the email on the menu under the title Email templates. Then select either a blank email or any of the ready-made email templates.
On the next page, select the recipients by clicking Add contacts. You can browse and select either individual contacts or lists by clicking Add. After you have selected the wanted recipients, click Save.
Give a heading for the email on the part Subject by clicking Add subject and write the text. Click Save.
You can also modify a preview text for the email if wanted. That text will be shown after the subject in the email.
Create the main content of the email by clicking Desing email in part Body. The following view will be opened:
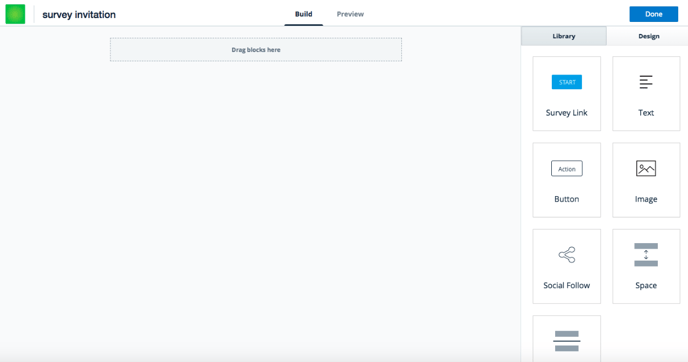
On the right side of the view, you can select different blocks to create the content of the email. Click, hold and drag a wanted block to the Drag blocks here box. Different blocks are:
- Survey link
- Text
- Button, a button with a URL link
- Image
- Social Follow, links to social media channels
- Space
- Divider
You can modify blocks by moving a mouse over and clicking Edit. On the right side of the view, you can, depending on the block, add a URL link, change the color and upload a picture.
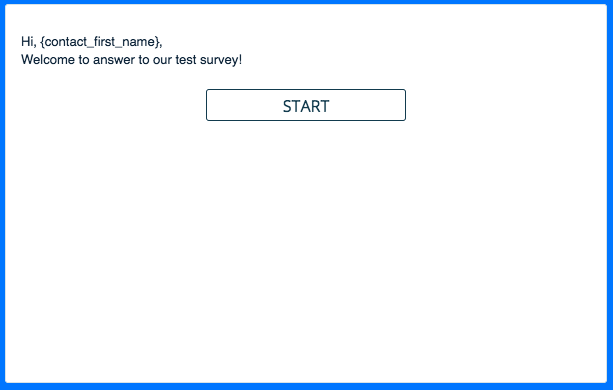
To a text block, you can add property texts by clicking Insert Property Text and selecting from the menu. Property can be, for example, a name of the survey or a respondent's name. On the picture below the used property {contact_first_name} will be replaced by each respondents' name in the actual email invitation sent to a respondent.
You can create a copy of a block by moving a mouse over the block and clicking the copy icon. If you want to delete a block, click the trash bin icon. You can move a block by clicking the two lines holding, dragging and dropping to a wanted location.
By clicking Preview, you can check that everything looks to be in order before sending the invitation to the evaluators. If everything is ok, click Done and Send.
On the next stage, the text Email sent will be shown, when the invitations are delivered to the recipients successfully.
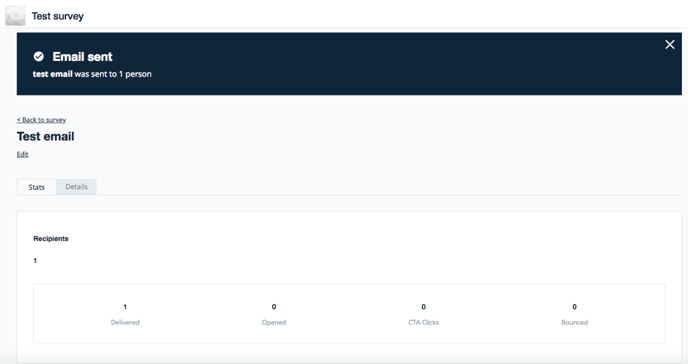
After you have sent the invitation to respondents, you can return to the settings of the survey by clicking Back to survey.
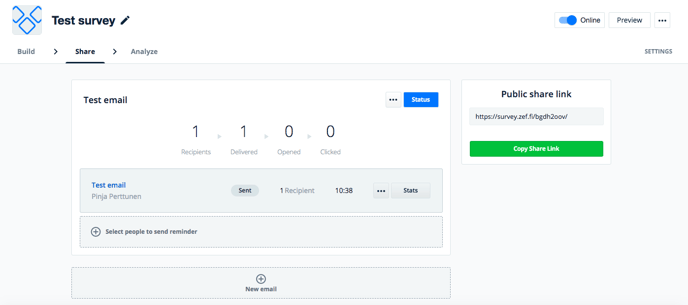
You will move to the tab Share. On that view, you will see all the invitation emails, their status, and statistic information. You can later return to the tab Share to send new invitations and reminders to respondents to this survey.